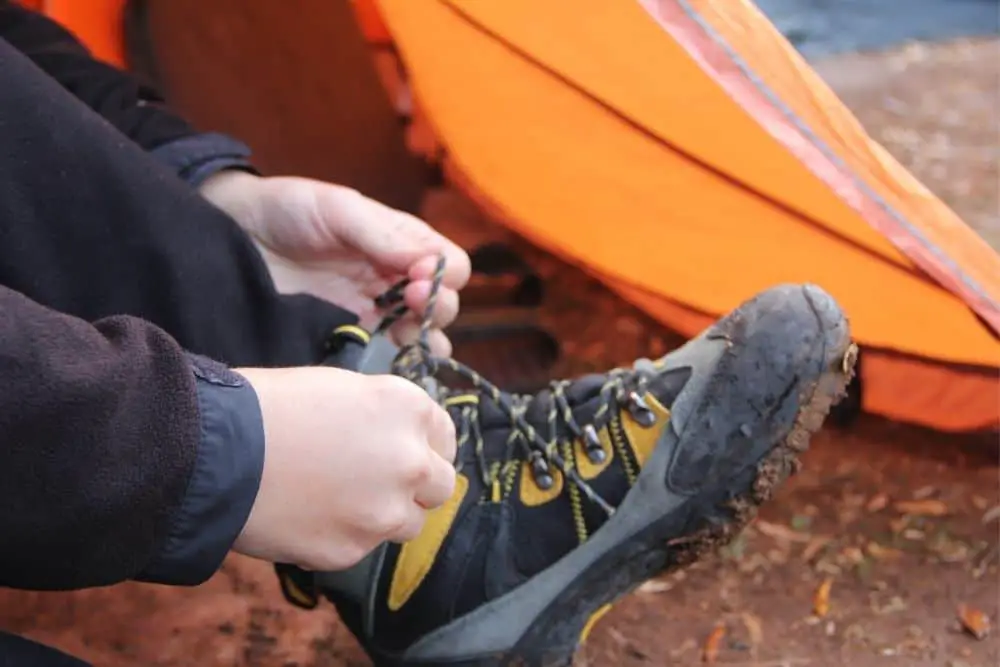
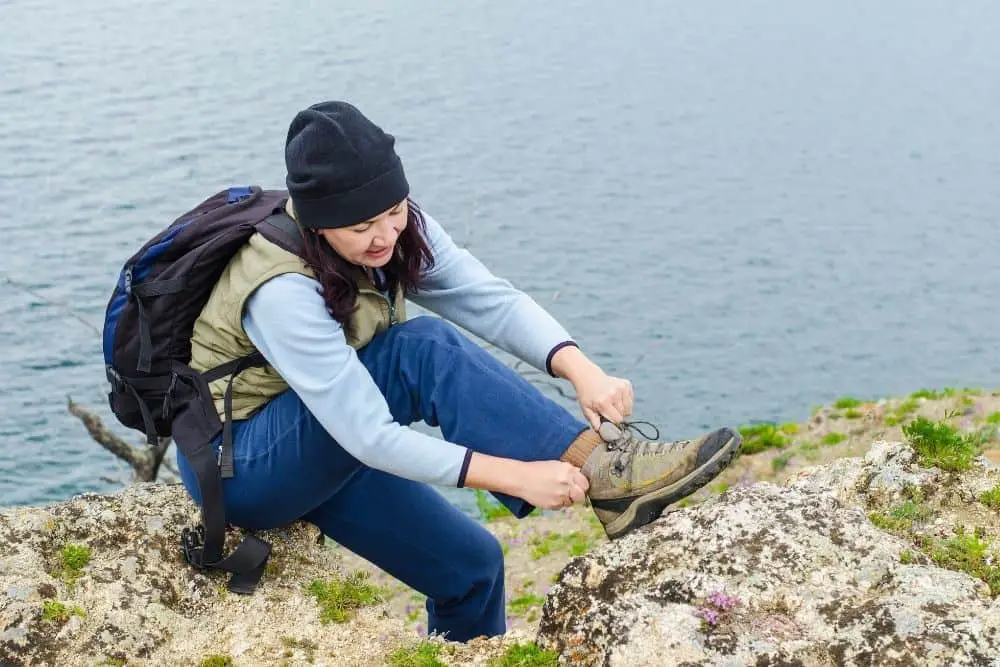
Tying hiking boots is quite different from the process you would take for your regular shoes. However, some people already know how to tie their shoes and maybe know a few ways to style them.
Of course, tying hiking boots is more than looking ‘stylish,’ it’s more intentional than that. There are motives behind lacing hiking boots, which are geared towards ensuring you keep healthy and happy feet while you hike.
In addition, tying your hiking boots the proper way helps to ensure that you stay comfortable when you go for a hike. So, you may be a pro at lacing up shoes for fun, but you’d need a different style for hiking because the boots are for ‘advanced’ walking.
If you’ve never had to lace your shoes before, you don’t have to worry. Lacing your hiking boots doesn’t require special skills, and most importantly, we’ll help you with simple step-by-step guides to follow.
We’ll list some of the different ways you can tie your hiking boots properly for your next hike. So, how to tie hiking boots?
Let’s find out in this article.
Contents
How To Tie Hiking Boots?
Like we stated earlier, there are different ways you can tie your hiking boots for maximum comfort and protection as you hike. However, the first thing you need to know is to get the exact hiking boots that fit your feet properly.
This is because even the best lacing technique cannot make up for such an error. So, always keep in mind that tying your hiking boots the right way won’t remedy them being overly tight or loose.
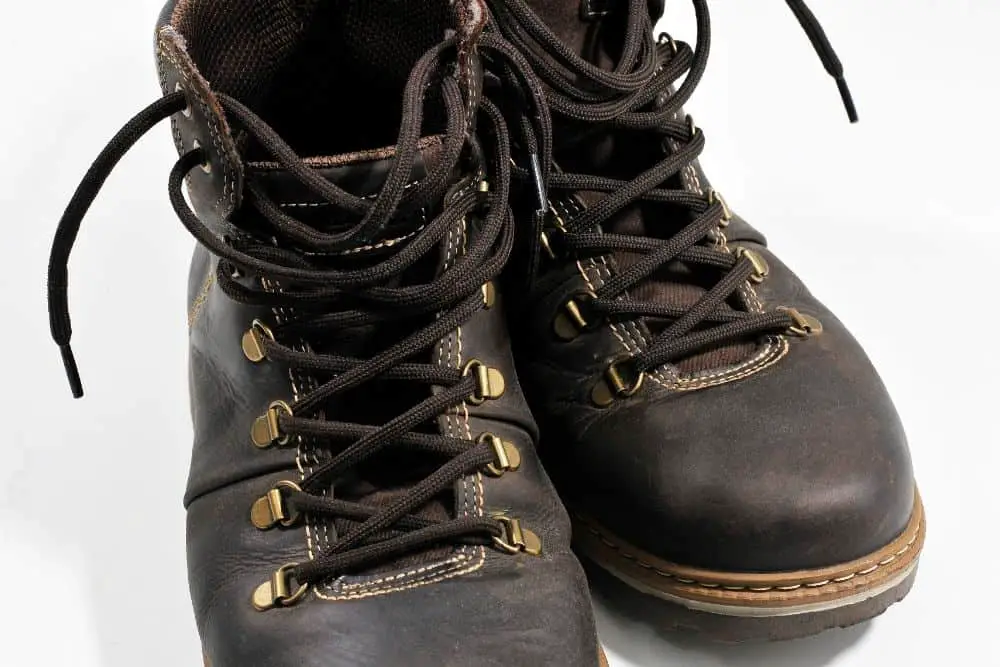
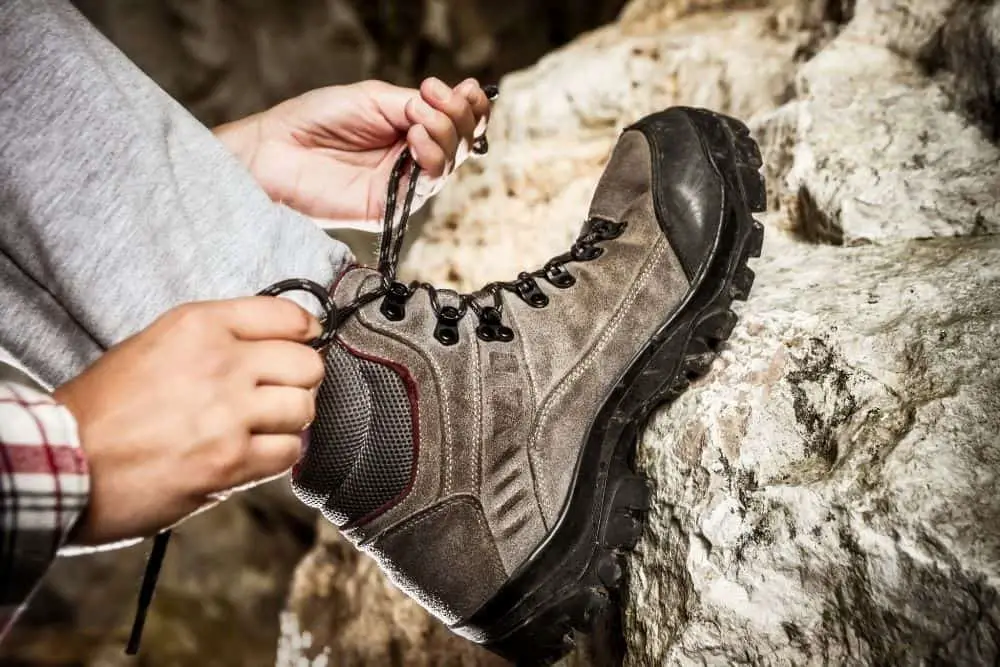
Tying your hiking boots involves passing shoelaces through their hooks or eyelets. And usually, hiking boots have round laces that you pass through the hiking boots’ hooks for better comfort and protection.
Now that we have established that, let us get into the methods of tying your hiking boots.
They are:
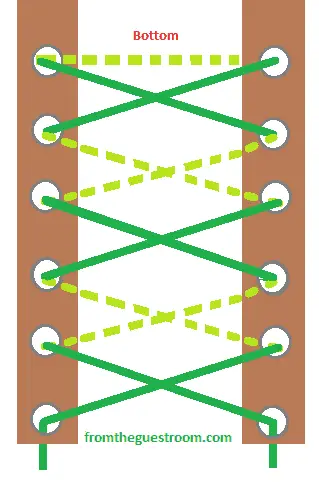
1. Standard crisscross
The standard crisscross form of lacing hiking boots is the simplest and probably one you’re used to. Primarily, it’s a widespread way of lacing footwear with lace hooks.
You can lace your hiking boots this way if you’re going for a short hike or just walking around in them. It helps you stay comfortable while you’re out for your work and involves less stress to do.
Steps to crisscross lacing
- Start by putting the two ends of the lace into the first pair of lacing hooks. Rather than it going inward, the movement should be outward. That is, you insert from inside instead of outside.
- Insert the lace into the next hook set like you did the first set from underneath. You cross the lace end on the right side to the left side and vice versa.
- Keep repeating that till you fill up the lace hooks on your hiking boots.
2. Surgeon’s knot
One of the methods to tie your hiking boots is the surgeon’s knot. This particular lacing technique is suitable for preventing heel slip when hiking.
You can try this method if you usually have heel slippage whenever you’re hiking. Generally, keeping your heels in place will help you prevent blisters on your heel area.
Plus, once you get this technique right, you don’t have to worry about your heels slipping out again. So how do you go about that?
Steps to tie surgeon’s knot
- First, you need to wear your hiking boots and stomp your heel on the ground so it moves to the back of your boots. That way, you keep them in place.
- Then, you need to start inserting the lace in the hooks on your hiking boots. You start inserting in the hook that is closest to the top of your foot.
- Insert the laces using the standard overhand knot for the first hook and then the next.
- After that, you thread the laces together; that is, twist them twice to tighten them. Again, ensure they’re tight enough before you insert them in the following hook sets.
- Thread the lace together again, ensure they’re tight, and insert it into the following hook sets.
- Lace-up the rest of the boots the usual way as you started.
3. Toe relief lacing
This lacing technique is for when you need some relief when your toes hurt a lot when hiking. You can relieve pressure in your boots’ toe box with this technique. What are the steps?
Steps to the toe relief lacing
- First, you need to wear your boots and unlace them completely.
- Then you lace it back up. When lacing, you’ll skip the first hook sets at the beginning around your toe areas.
- You then lace up the rest of your boots the usual way. There! You can enjoy hiking without toe pains.4.Window lacing technique
This is another way to tie hiking boots. This tying technique helps to relieve pressure on the top of your foot. Some people call this lacing method box lacing.
Steps to window lacing
- First, you need to unlace your boots up to the lace hook sets that are just above the pressure point. This is the second set of lace hooks on your boots.
- After, start re-lacing. Lace the next hook straight up without crossing the lace over, creating a window.
- Then, lace up the rest of your boots the usual way, or you could try twisting it like the surgeon’s knot above or below your window.
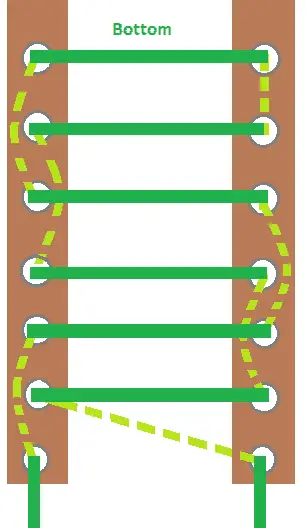
4. X lacing
This method is quite similar to the crisscross technique, but this one has a few modifications. Also, you can use this lacing technique to reduce friction and lace wear and tear. This lacing method is suitable for simple hikes and nothing rigorous or challenging.
Steps to X lacing
- Insert the lace endings through the first lace hook sets from under and pull them out.
- After, you cross the laces, twist them together and pull them through the next hook set. However, this time, insert them from outside instead of underneath.
- Then, you cross the laces and insert them into the next hook set from inside. That is the reverse of the previous step.
- You keep interchanging that way till you finish lacing your boots.
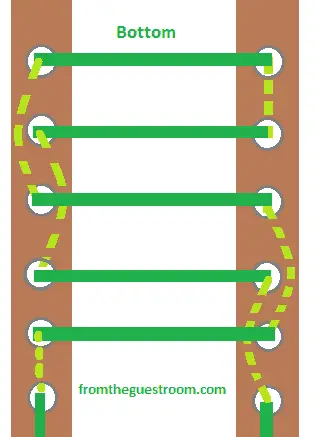
5. Ladder lacing
This lacing method helps to provide extra stability for your feet when hiking. Just like the name implies, when you finish lacing, it looks like a ladder and can help your boots stay tight through hiking.
Before you try this lacing method, ensure that your hiking boots have enough lace hooks so the lace can function more meaningfully and not look scanty. What are the steps to follow?
Steps to ladder lacing
- Start by inserting the two lace ends in the first hook pair at the beginning, around your toes. Then, ensure you insert it inside out.
- Then, hold the lace and insert it through the next lace opening on the same line, from outside to inside. So the same thing with the lace end on the left side.
- After, take the right lace and cross it to the left side and enter it in the opening right beneath the lace hole beneath the left one. Then repeat the same thing for the left lace as well.
- Keep repeating the process till you lace the boots to the top.
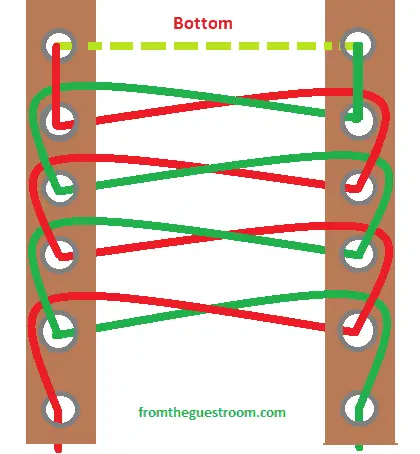
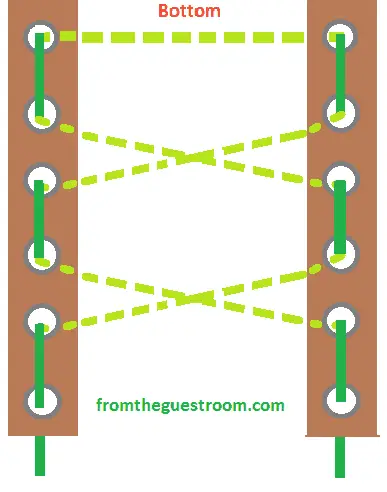
6. Bar lacing
This is another method of lacing hiking boots. It doesn’t involve any form of crisscrossing, and you’ll get a neater outcome for your hiking boots.
Also, it is more straight and orderly than some other lacing techniques. It helps to keep your boots tight and prevent stuff from entering your boots.
More importantly, they stay tight for an extended period, and you may not have to re-lace your hiking boots till after you finish your hike. However, this method is only suitable and effective for hiking boots with an even number of lace hooks.
Steps to bar lacing
- Insert the two lace ends into the first set of hooks at the bottom inside out.
- After, pull the right end of the lace and insert it to the next eyelet inside out.
- Then, cross it to the left side and insert it into the next eyelet above the left one from outside to inside.
- Take the left lace, skip the opening that the right one occupies, move to the opening right after it, and insert the left lace inside out.
- Then, you take it to the other side and insert it in the next opening beneath the right one from outside to inside.
- Keep going that way till you reach the top of your hiking boots.
If you have an even number of lace hooks, the laces will end up at both ends without you having to crisscross them. However, if it’s an odd number, you would have to cross one of the ends to the other side. This method makes the lace look like bars between the hooks rather than crisscross.
7. Army lacing
This is another common method of lacing footwear. So, you can also incorporate it into lacing your hiking boots. It’s a more relaxing way to tie hiking boots so your feet can wiggle more freely inside.
This method can work for even and odd number lace hooks, discussing both steps.
Steps to army lacing for even number hooks
- First, insert the two ends of the lace through the first pair of hooks inside out.
- Take each end of the lace and insert them to the next hooks directly above each. Insert them from outside to inside.
- Then, take one end of the lace, cross it over diagonally, and insert it to the next open eyelet.
- Repeat the same for the other lace end as well. Again, you should ensure that the lacing goes through the bottom of the eyelet and be straight before you cross it for the eyelet above.
- Keep repeating the steps till you get to your hiking boots top.
Steps to army lacing for odd number hooks
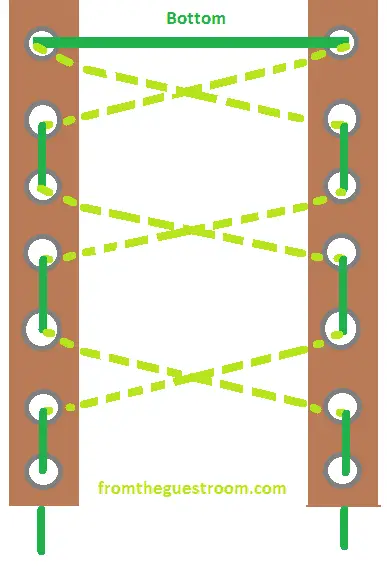
- First, insert the lace ends into the first pair of eyelets from outside to inside.
- Hold one end of the lace, cross it over diagonally to the other side, and insert it in the next open eyelet inside out.
- Do the same thing for the other lace end.
- Insert the laces straight in the next pair of eyelets above them from outside to inside.
- Keep repeating the last three steps till you reach your boot’s top.
8. The granny knot/ Square Knot
This tying method is usually a finishing touch to any lacing method. After lacing the boots to the top, you then use the granny knot or square not to tighten the lace, so it doesn’t slack on the boots.
Steps to tying the granny knot
- Pull the lace at both ends together and tighten them.
- After that, take one of the lace ends and double it back on each other, and it will form a bunny ear.
- Then, take the other one and wrap it over the bunny ear, forming a loop under it using your thumb.
- After, take the loose end of the lace and hold it against your thumb with your index finger.
- Then use your index finger to put the lace into the hoop and pull it out, but not completely to create another bunny ear.
- Then, hold both bunny ears and pull till you feel the lace tighten around your feet.
You can differentiate between a granny knot or a square knot based on the length of the bunny ears. If the bunny ears run across your hiking boots lengthwise, that’s a granny knot. But if it runs widthwise, then it’s a square knot.
9. The quick pull knot
This is another finishing touch method to tighten the lace around your feet. You can try this technique if your hiking boots have a pull-cord lacing system.
Steps to tying quick pull knot
- First, you need to lace your boots to the top.
- After lacing your boots to the top, you then loop the lace around the quick lace hook.
- After that, you only need to pull, and your hiking boots will tighten around your feet.
How Tight Should You Tie Hiking Boots?
When tying your hiking boots, you should be all about comfort and support. You need your boots tight enough to lock your feet in place without slipping around and not so tight that it becomes unbearable.
Tying hiking boots isn’t the same for everyone. So, while you think what is too tight for someone might be loose around your feet. However, you should make yours tight, just enough to the right level.
You need something taut and not overly tight. The right tightness won’t leave room for loose or slacking laces. Instead, it’ll be even and firm on the hiking boots.
But in the end, it depends on you. You need to listen to your feet and know which one feels uncomfortable when hiking; that way you don’t go extremely hard in that area.
Also, that will help you choose the best lacing that will reduce pressure on that area. Plus, you don’t want to fasten your boots so tight that you end up with blisters or toe pains.
You could also use some tips as you hike. For example, you can use the following tips when tying your hiking boots:
- If you’re hiking down a hill, ensure that you tighten your hiking boots around the heel side. This will help prevent your feet from sliding to the front of your boots.
- You should probably re-lace your hiking boots after 20 minutes of hiking. This is because your feet may swell as you hike, and you would want to lace your boots in a way that’ll accommodate your swollen feet and make you comfortable.
- When you’re hiking up a hill, don’t tighten your lace too much. Instead, allow it to slack a little bit so your feet can move a bit freely in your boots.
Like we mentioned, the most important thing is that your hiking boots fit properly. It doesn’t matter if you tighten your boots too much or slacken them; they won’t do much in remedying your discomfort.
So, it’s more important that you get hiking boots that fit perfectly. The lacing methods and tips are only extras to ensure that you feel comfortable and stable when hiking. Remember to listen to your feet and choose a lacing technique that won’t hurt them.
Conclusion
Tying your hiking boots shouldn’t be a big deal since you’re probably already used to tying other footwear in the past. However, since this involves hiking, you may want to lace your boots differently since you need to be comfortable and stable.
There are many methods to tie hiking books that you can select from. But first, you need to know the pressure points around your feet; that is, the place that hurts when hiking.
From that, you can know the ideal way to tie your hiking boots for maximum support and comfort. This article discussed eight methods to lacing your hiking boots and two methods to finish up.
Also, we gave step-by-step instructions as to how you can do them. We also mentioned some tips that can help you decide how much you need to tighten your hiking boots for the best hiking experience.
Now that you have all that information, you can try any lacing methods for your next hiking trip and ensure you follow our instructions.