
Slip and fall are one of the frequently reported forms of injuries reported among hikers and the majority of the cause has to do with their hiking boots.
Slippery hiking boots can be a potential source of disaster when on a hike particularly if you are hiking in a wet mountainous area.
When shopping for a hiking boot it is paramount to find the one that will give you adequate stability.
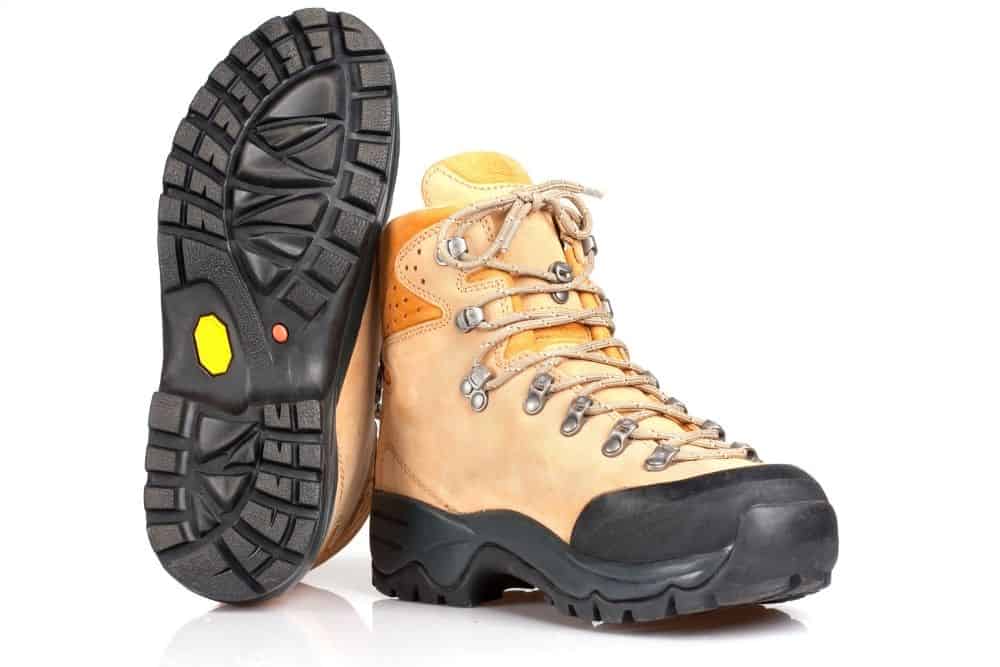
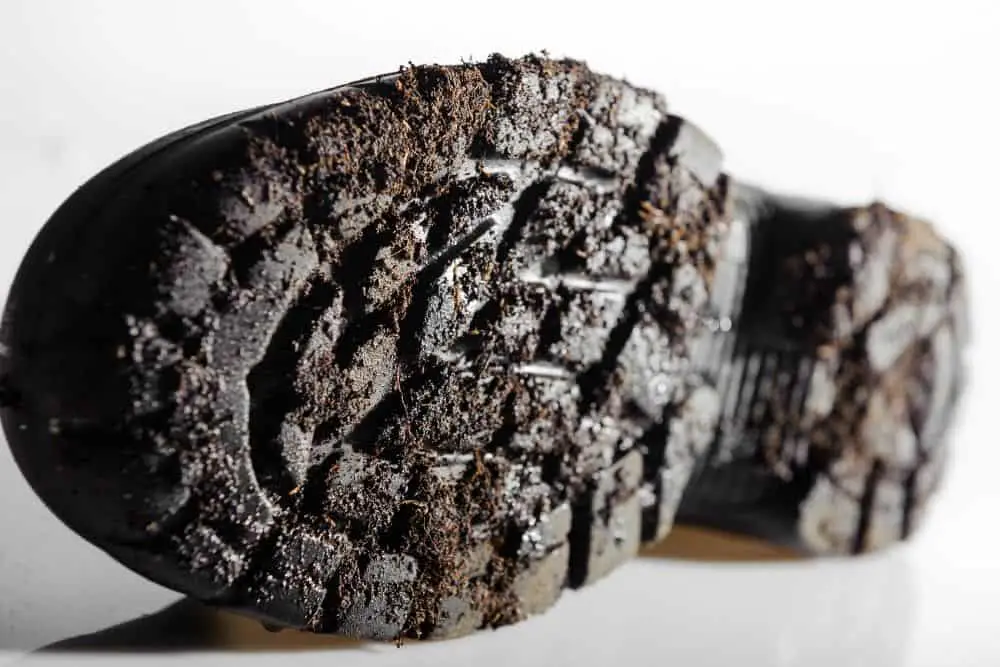
Generally, hiking boots are designed with outsoles that have better tractions and grips compared to other types of shoes. Special traction patterns are carved on the outsoles for improved stability.
Sadly, every boot will succumb to friction sooner or later. The more you use your hiking boots the rubber outsoles gradually start eating away and lose their traction thereby becoming more slippery.
While slippery outsoles are less common with new boots, it is a challenge that any boot can face—on purchase or in the future.
What will you do when you notice that your precious boots have become slippery?
Perhaps, you were hiking on a snowy morning and suddenly lost your footing and fell with a thud—something that has never happened before. Will you throw away the boots or try to fix the problem?
If your answer is the latter, you are in the right place.
We are going to share interesting hacks that will help you to make your boots less slippery and safer for hiking steep trails and rocks. Making your outsoles less slippery will also make hiking easier and more enjoyable since you won’t be fearing for your life.
Contents
- Why are my hiking boots slippery?
- How to make hiking boots less slippery?
- 1. Use non-slip shoe pads
- 2. Graze the bottom of the outsoles with sandpaper
- 3. The use of anti-slip spray
- 4. Carve diamond treads under the outsole with a knife
- 5. Use snow grips
- 6. Stick coarse material under your boots
- 7. Unclog the treads of your boots
- 8. Change the outsoles of your boots
- 9. Improvise with band-aids
- Other ways you can prevent your boots from slipping
- Conclusion
Why are my hiking boots slippery?
Several factors can make your hiking boots slippery. However, sometimes the slip is because you are using the boots on a surface they were not designed for. At other times the slip may result from friction due to an extended period of use. We will discuss some of these issues in detail below.
Hard rubber outsoles
Some boots have hard rubber outsoles to make them more shock absorbent.
These kinds of outsoles are more comfortable to use on rough terrains so that stepping on tiny pebbles and shocks from rock bumps won’t hurt your feet.
However, the harder the outsoles the more slippery they will become on wet surfaces—like wet slippery rocks.
Hiking boots with soft or flexible outsoles will tend to be less slippery compared to those with stiffer outsoles.
The outsoles of hiking boots often harden if left for a long time. This is why you may have noticed that boots can become slippery with age.
Inefficient treading
The grooves at the bottom of boots are called treads.
Designers often look to nature to find inspiration as well as put in applications from several reliable footwear research for crafting designs that provide sufficient grip to resist slips and fall.
A lot of thought goes into the creation of these tread designs to make sure they deliver on their purpose.
A boot with smooth outsoles will be more slippery than another with rugged treads.
Therefore, it is important to properly consider the outsoles of the boots you want to buy to make sure they are provided with proper treads, especially if you will be hiking wet hard surfaces.
Hiking bad surfaces
The best boots will still slip on some surfaces—regardless of their tread or grip.
Steep slopes become more dangerous when it rains and the treads of your boots may not be enough to save you. That is why it is always important to choose your hiking trails and times carefully.
For example, hiking the Dolomites in October is not a good idea even if you are using boots of the highest quality.
Ultimately, avoid trails that involve climbing or feature rocks during the wet seasons. Instead, only hike plain surfaces with sand and grass.
Wear from age
While new boots tend to be slippery because of their glossy finish, old boots become slippery as their treading fades.
In addition to worn-out treads, the rubber outsoles become stiffer. The combination of these factors makes the boots become more slippery than new ones.
How to make hiking boots less slippery?
Some boots are advertised as non-slip. This information is usually found somewhere inside the shoebox or inside the shoe.
However, you can also look at the treading on the bottom of the boots. Non-slip boots usually have more than one pattern carved into the outsoles.
If you are conscious of slipping and falling, it may be a good idea to choose boots with lugged Vibram outsoles. Vibram outsoles have a good tread design that enhances grip. This makes them the ideal choice for rough terrain.
Vibram outsoles are an innovation born from an unfortunate incident in the Italian Alps. Vitale Bramani, the founder of the company decided to create the rugged outsoles after losing close friends to that incident.
If you have already ended up with slippery boots, don’t throw them away just yet until you have tried all the solutions we outlined below.
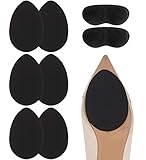
1. Use non-slip shoe pads
If the treads of your boots have worn out due to age leaving you with a smooth slippery surface, one of the techniques to restore grip to your boots will be the use of non-slip shoe pads.
These shoe pads are made of durable rubber with strong self-adhesive.
They come in various shapes and sizes—albeit you can cut them into other desired shapes or fit the outsoles of your boots better.
They are more suitable for leather outsoles and can be a hiking essential if the weather forecast predicts light showers.
- MATERIAL: Made of durable rubber with strong self-adhesive, sticked on sole. Ideal for shoes with...
- NON-SLIP CUSHION PADS: Easy to stick to your shoes and they will keep in place, make the smooth...
- ANTI-SHEDDING SOLE PROTECTORS: Stop slipping while you walk or run. Perfect for leather shoes,...
Last update on 2023-11-11 / Affiliate links / Images from Amazon Product Advertising API
Pros
- They are highly efficient in improving traction and drip
- Customizable to fit the under of your outsoles so as not to alter the aesthetics of your boots
- In addition to providing grip can prevent smooth leather outsoles from wear
Cons
- The non-slip effect wears off really fast and you may need to change them often
- The self-adhesive glue is sometimes too weak to hold them in place
- Cannot be used on outsoles with treads
2. Graze the bottom of the outsoles with sandpaper
The smoother the bottom of the outsoles of your boots are, the more slippery they will become, and the higher the danger that you can fall and bruise yourself.
One common way hikers increase the grip on their boots is the use of sandpaper.
Using sandpaper of your preferred grit size, rub the bottom of the outsoles until they assume a rough texture.
Peradventure you were already on a hike when it dawned on you that your boots were slippery and you have no sandpaper, one of the things that you can do to boost the traction of your boots is to rub them against a rough hard surface like rocks, gravel, or concrete.
Like we mentioned earlier, new boots tend to be slippery too because of their glossy outsoles with a perfect finish. Wearing off the perfection will help to give it better traction.

Last update on 2023-11-11 / Affiliate links / Images from Amazon Product Advertising API
Pros
- It is a quick-fix with a near-instant result
- You can perform it at home or on the hike
- Easy to learn
Cons
- Can leave deep cracks on the outsoles that eventually lower their durability
- Wears down the aesthetics of the boots
- The traction created is short-lived
3. The use of anti-slip spray
As creepy as this may sound, there are actually sprays designed to make boots less slippery. Most of the sprays are quick-dry.
All you need to do is spray it under your boots and allow it to dry. Once dry you can walk around in your boots and expect that it becomes stickier.
Interestingly, anti-slip spray can be used to give you temporary stability when hiking icy surfaces.
In the absence of an anti-slip spray, you can make use of hairspray to achieve temporary traction on your boots. Whichever you are using, make sure it dries completely before stepping using the boots.
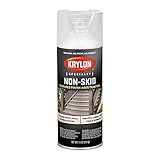
- Krylon Non-Skid Coatings Aerosol Clear
Last update on 2023-11-11 / Affiliate links / Images from Amazon Product Advertising API
Pros
- It is a quick-fix that you can carry with you on a hike
- The application process is simple and doesn’t require extra knowledge
- Easy to repeat multiple times a day
Cons
- The waiting period for the spray to dry can be frustrating
- The effect is more temporary than all the other techniques
- The spray may discolor the body of the boots if it mistakenly spills on them
4. Carve diamond treads under the outsole with a knife
This one can be scary for most people but it is a technique that works.
If the treads under your outsoles have worn out, you can use a knife to carve new ones and restore a large percentage of the grip that you once enjoyed.
All you need to do is to take out a knife from your backpack and carve out diamond shapes under the outsoles of your boots. This allows water to pass in-between the treads under the boots giving you more traction.
Pros
- It is a more permanent solution so you don’t have to stop every few hours
- Allows you to customize your boots
Cons
- Time-consuming
- Requires delicate skills which may not be easy for anyone
- Leaves deep permanent damage on the boot outsoles
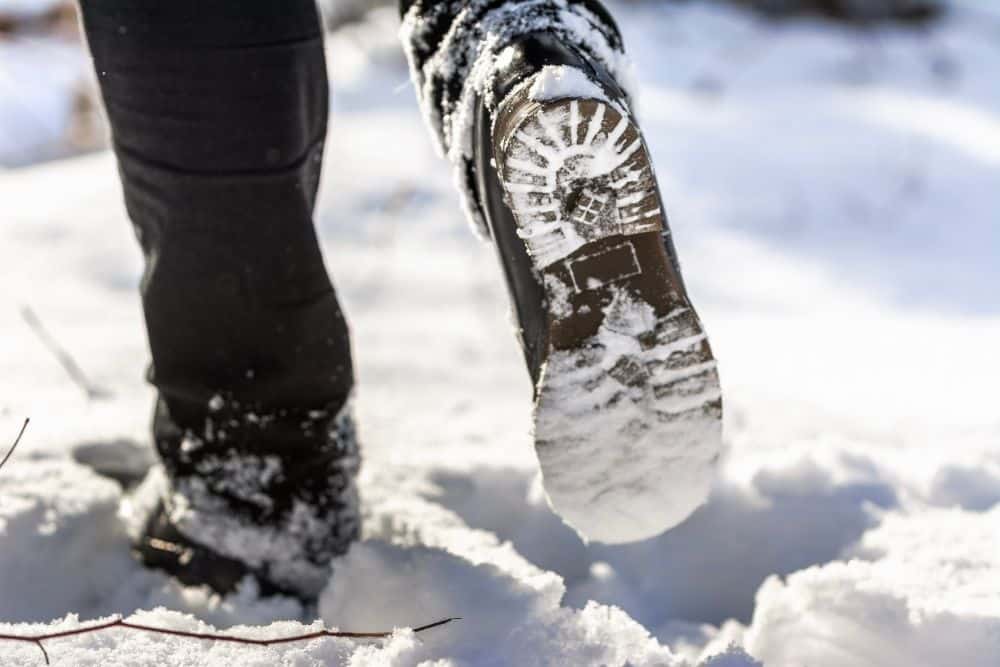
5. Use snow grips
Hiking on snow can be tricky and even the boots with the best treads can become useless in preventing a slip.
Snow grips are designed to fit under the boots to increase traction when hiking on snow. They are usually made of abrasion-resistant steel and heavy-duty rubber.
Snow grips are secured to boots using rubber straps which allows them to fit. Unlike grip pads, they are resistant to huge temperature changes and will not slide off as you walk.
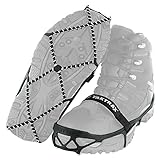
- Traction cleats that fit over shoes for safely walking, hiking, or jogging on packed snow or ice
- Made of high-strength, abrasion-resistant 1.4 mm stainless-steel coils and heavy-duty rubber;...
- Provides 360 degrees of traction on cold surfaces for all-direction stability
Last update on 2023-11-10 / Affiliate links / Images from Amazon Product Advertising API
Pros
- Highly durable and resistant to temperature changes
- Will not slide off your foot like grip pads
- The integrity and aesthetics of your boots are not compromised
Cons
- Getting the right size for your boots can be a serious challenge
- The rubber strap can snap rendering the product useless
- Can cause a strain on your budget
6. Stick coarse material under your boots
This technique relies on the principle that the smoother the outsoles of your boots the higher the chance that it would slide over smooth or wet surfaces.
One of the ways you can add coarseness to the outsoles of your boots is the use of adhesive spray and sand.
Spray the adhesive spray on the bottom of your outsoles. They sprinkle the area with dry sharp sand and press it down to dry. The sharp sand adheres to the boots and improves traction.
Alternatively, some people make use of salt and rubber glue mixture to add grits to the outsoles of the boots. The mixture of salt and rubber glue is layered underneath the boots and allowed to dry.
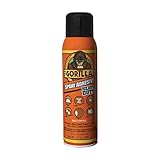
- Heavy duty - dries permanent
- Repositionable, non-yellowing, Photo safe
- Comfort nozzle - wide pad, controlled fine mist - even application
Last update on 2023-11-11 / Affiliate links / Images from Amazon Product Advertising API
Pros
- It restores traction quickly and can be used on the hike
- Doesn’t cause any permanent damage or scarring to your boots
- Almost anyone can pull it off
Cons
- This is a temporary solution as the glue will eventually wear off
- Glues can spill to unwanted areas of the boots
- The process is time-consuming
7. Unclog the treads of your boots
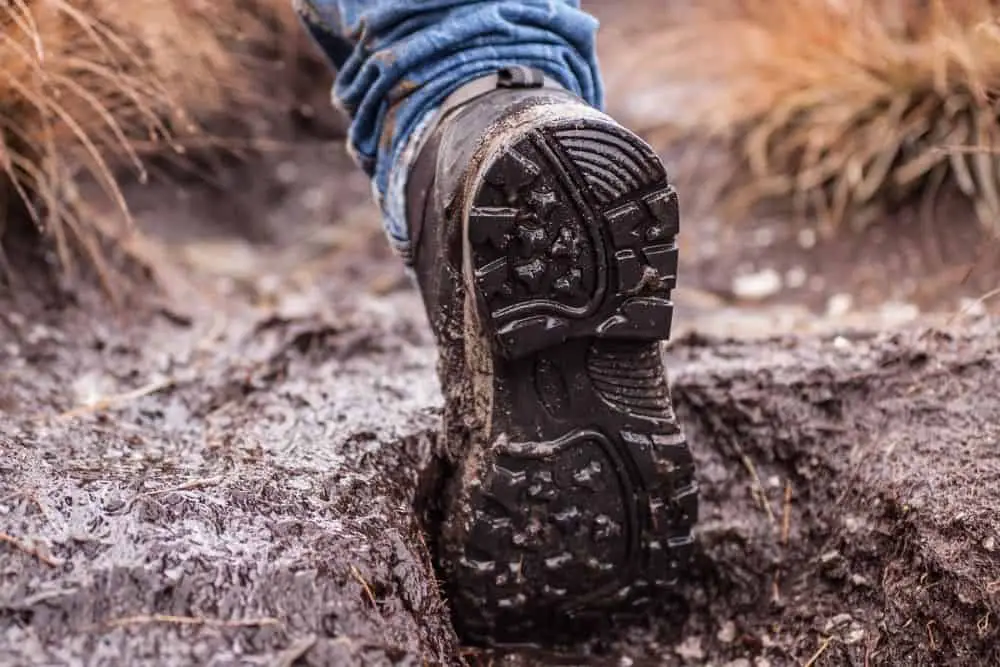
When hiking muddy, wet clay, or surfaces strewn with tiny pebbles, these materials will get between the treads of your boots making your outsoles appear smooth.
Using a knife to pry out the mud and stones that clog the treads can restore traction to the boots.
Pros
- Doesn’t involve deforming your boot outsoles
- Easy to perform and doesn’t require any special skill
Cons
- For long hikes, you may have to stop multiple times to unclog
- The process of unclogging the treads can take up to an hour and is exhausting
8. Change the outsoles of your boots
As you continue to use your boots, the treads on the outsoles will wear out.
Sometimes, all you need is to take it to a cobbler to have them resoled. A good cobbler will change the outsoles and leave your boots looking like new ones—except with better traction.
Pros
- Gives the boots a brand new look
- Saves you the cost of getting new ones
Cons
- A trip to the cobbler is not always cheap
- Some cobblers can delay in returning your boots which may disrupt your hiking plan
9. Improvise with band-aids
When grip pads are not available, band-aids can be a close temporary alternative—and you have no reason not to have one when you are out on a hike.
Band-aids are designed to be used for first aid care for covering minor wounds and cuts from infection.
However, you can also put them to use in preventing your boots from sliding.
This is not a popular idea but placing the bandages on the heel and toe area of your boot outsoles can give you a bit of traction that can see you all the way to the trail end.
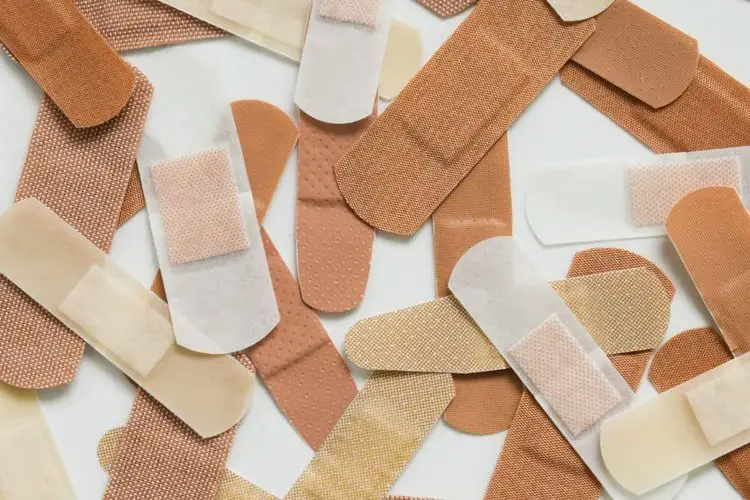
Pros
- Band-aids are camping essentials which you will likely have with you
- Requires no technical knowledge to use
- Will not scar your outsoles
Cons
- The effect is temporary and only small traction is gained
- You may need to change them multiple times before the end of your hike
- Increased environmental pollution from spent band-aids
Other ways you can prevent your boots from slipping
- Staying alert and watching where you place your steps can prevent you from crashing to the ground. Avoid stepping on wet leaves or slippery organic matter like banana peels. Always walk on a clear path and avoid stepping on items that may be potentially slippery.
- Also, the faster you walk the less balance you will have and the easier it will be for you to fall with the slightest trip. Try not to rush through your hikes—and that will mean properly planning your hikes and having a clear knowledge of the area you plan to hike.
- Hiking with a friend may not be a bad idea after all. When in dangerous situations, an outstretched arm can make the difference between life and death.
- Keeping your loads light is also a great way to keep your balance. Carrying too much in your backpack can throw you off balance and affect your posture making it easier for you to fall. While planning your hike, only plan to carry items that are extremely important for your hike and leave everything else behind.
- Avoid hiking at night for several reasons. Firstly, humidity is higher at night from dew, fog, or rain which makes the terrain more slippery. Secondly, it is more difficult to see your surroundings properly at night regardless of the brightness of your light source.
Conclusion
When choosing a boot, it is important to pay attention to the outsoles. Choose boots with soft rubber outsoles since they have a better grip than boots with thicker rubber.
Besides having better grip, they are lighter which can empower your legs to cover longer distances. But, make sure they have good treads or they will still not offer the kind of grip that you need.
No matter how good your outsoles may seem, they will wear over time.
Having the knowledge of two or more techniques that we listed out in this article can be a lifesaver at those awkward moments when the outsoles fail to offer you the right grip.