
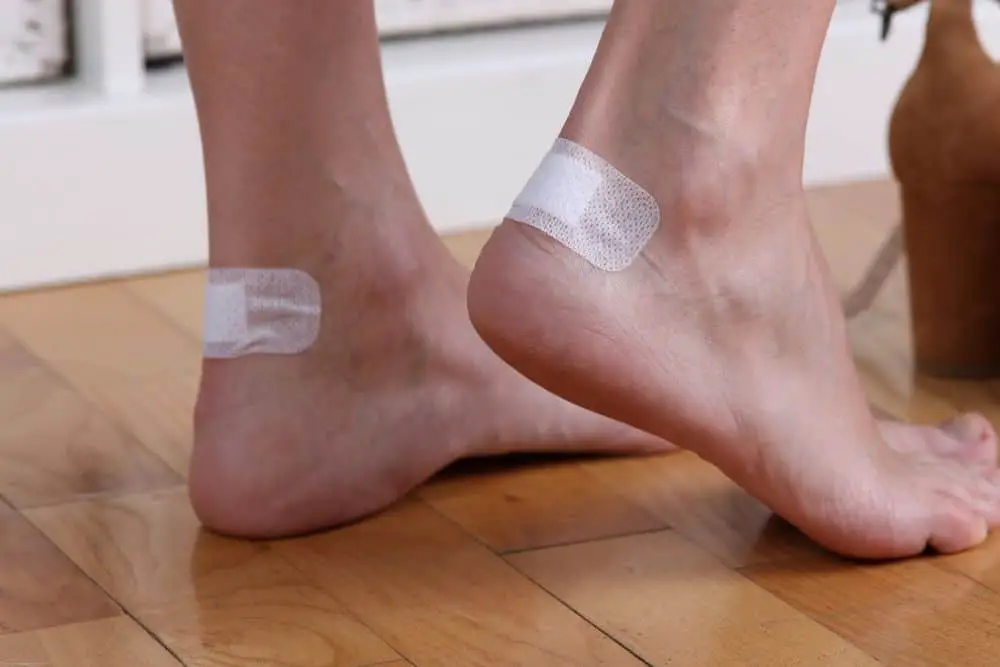
We understand that blisters are pretty common when hiking on trails. And it seems like almost every hiker has or has nearly experienced the burning sensation in their feet.
Due to the rigorous activities you do with your feet in hiking boots, you are prone to blisters, and there are several things that can cause them on the trail. Generally, friction caused by different factors makes the upper layer of your skin peel, making that area throb and you feel uncomfortable on the trail.
Some of the things that can cause blisters are when you wear unfit hiking boots or sand, dust, stone, or debris gets into your footwear. Less likely, it could also be due to sweaty or wet feet or wrinkled socks.
In some cases, you may not be able to do much to prevent those things from happening because so many unpredictable things happen on the trail. But what you can do is lace your hiking boots properly to prevent blisters from forming on your feet.
Of course, there are other ways in which you can prevent blisters, like wearing the right-fit hiking boots, keeping dry feet, and so much more, but this article focuses on tying your boot laces appropriately.
Let’s get into it right away!
Contents
How To Tie Hiking Boots To Prevent Blisters?
Of course, you can tie your hiking boots to prevent blisters on your feet, and it is pretty easy to do that. Now, you may be wondering what it is about tying boots since you have been lacing your shoes yourself right from time.
However, tying your hiking boots to prevent blisters is quite different from that but not complicated. So the methods are not some out-of-the-world kind of technique. If you have been wondering how to tie hiking boots to prevent blisters, here are some methods:
Method 1: Surgeon’s knot
Sometimes, when you wear your hiking boots, you notice that your heel slips in them. This could be a result of too much room at the top of your hiking boots.
It involves tying your laces at strategic spots on your hiking boots to secure the top part of your boots and lock your heels in place. In addition, it can help you segregate tight and loose sections in your hiking boots.
Furthermore, it ensures that your laces don’t undo when on the trail. So, you can keep hotspots on your feet to relieve the pressure on that side and tighten other areas that need to be tight. And with two surgeon’s knots, you can lock your heel in place.
So how do you tie a surgeon’s knot?
Step 1: Start lacing your boots
First, you need to start lacing your boots using the usual technique you are familiar with, like the crisscross. Do this for the first two eyelet sets.
Step 2: Tie first surgeon’s knot
After the second crisscross, you tie your first surgeon’s knot. You do this by twisting or threading the two lace ends against each other. Ensure you make them tight enough to undo and insert both ends to the other sets of eyelets to lock the twist.
Step 3: Tie second surgeon’s knot
After passing the laces to the next set of eyelets, thread and twist the laces against each other to make your second surgeon’s knot. Then, pass the end of the laces through the next set of eyelets to lock the surgeon’s knot and prevent them from losing.
Step 4: Lace-up to the end
After getting your second surgeon’s knot, you then lace your boots to the top the way you started, using the criss-cross technique.
Step 5: Finish up the end of the lace
After lacing your boots all the way to the top, you tie the lace in place using the granny’s knot or quick pull method. There, you have succeeded in tying the surgeon’s knot, securing your heels, and preventing blisters.
Method 2: Window lacing
Another lacing method that can help prevent blisters in hiking boots is the window lacing technique. This lacing method helps to reduce pressure on the top of the feet.
When hiking, your feet may swell at some point, causing pressure in some parts of your boots. Eventually, this will make your feet rub against the inner of your hiking boots. In other cases, it could be that when you wear your boots, you may feel some pressure on hotspots on your feet.
The best way to reduce pressure and prevent blisters in the hotspots is to use the window lacing technique. You can either start your hike with this lacing technique or tie it while hiking when your feet have swollen a bit.
This will relieve your feet of some pain and pressure, allowing them to breathe a bit before you continue your hike. Window lacing involves you not crossing your laces to the other side for a few eyelets, forming a window.
You can see this window anywhere from the bridge of your hiking boots. This means less rubbing. How do you tie window lacing?
Step 1: Determine pressure spots
Before you start tying or retying your hiking boots’ laces, you first need to identify the pressure spots in your footwear. Next, identify the area where your feet are rubbing against your hiking boots, causing the pain. Then, note the eyelets around that area before you continue.
Step 2: Tie or untie your laces
After identifying the pressure points, you start tying your hiking boots. You can start tying by using the usual lacing method you are familiar with. Since you are probably more familiar with this technique, you can try this method.
Lace up your boots with this method till you get to the pressure point. If you are retying your hiking boots on the trail, then loosen the laces till you get to the pressure point as well.
Step 3: Create the window for your feet
When you are at the pressure point, don’t cross the laces to the other side. Instead of doing that, insert the laces into the eyelets right above them, forming a straight line. Thread them straight up till you get above the pressure point on your feet.
Step 4: Continue lacing your boots
Once you are above the pressure point, keep lacing your boots to the top the way you started, using the criss cross technique.
Then, finish up by tying the laces in knots so they don’t loosen when hiking. With this method, you should feel less pressure and pain in your hiking boots.
Remember to retie your laces at intervals, especially when on longer hikes, and create a window for the pressure points you feel.
Method 3: Toe relief lacing
You can also prevent blisters by using the toe relief lacing technique. This lacing technique helps to relieve pressure in the toe box area and create more room for your toes.
It helps to prevent your feet from rubbing against each other or the inside of your hiking boots. You can tie your hiking boots like this in the middle of your hike to reduce the pressure in your toe area.
You could also try it when your toes begin to hurt before your hike. This could be because your toe box areas are stiff, and you may need to stretch them. Otherwise, it could be that your hiking boots just don’t fit in that area, and that would make your toes suffer on the hike.
However, if you have no other option to choose at that moment, you can manage with this technique until the hike is over. Then you can get hiking boots that fit correctly. How do you reduce pressure and blisters with this lacing technique.
Step 1: Create the toe room
If you are already on the trail and need to relieve the pressure in your toe area, you first need to undo the original lacing style you started with. After that, you start lacing your boots.
The difference now is that you will leave the first set of eyelets. So don’t start lacing from the first set; move to the next set and insert your laces from there.
Step 2: Lace your hiking boots
After leaving the first eyelet set and creating room for your toes, you can lace your boots up. You can lace them up using the crisscross method up to the top or finish them up with the heel-lock loop knot at the top.
Then, tie the lace with the finishing technique, the granny knot, or quick pull. After that, you will notice a difference in your toe areas.
Not lacing the bottom set of eyelets creates more room in the toe box and relieves your toes of pain, reducing friction and the likelihood of blisters occurring. This should probably be your go-to lacing technique for toe relief on the trail, and you can keep enjoying your hike without feeling pain.
Method 4: Heel-lock lacing

When hiking, your feet are prone to lifting in your boots. And heel lifts in hiking boots can happen for different reasons. For instance, it could be because your hiking boots do not fit snugly around your feet. This can result in high friction and the peeling of your top skin layer.
Another possibility is that the padding in the hiking boots has reduced over time due to constant wear or long-term use. When this happens, it enlarges the space in your hiking boots, causing your feet to slide up and down.
In this case, you got the right fit of hiking boots, fitting snugly but stretching over time due to use. You can make up for that space with thicker socks, and you can prevent blisters by tying your laces correctly and locking your heels in place in your boots.
The heel-lock technique is the way to ensure your heels lock into your boots and prevent blisters. How do you tie this tying technique?
Step 1: Start with crisscross
For this lacing technique, you will start with the crisscross technique that you are pretty familiar with. But, first, you will need to insert the ends of the laces through the first set of eyelets on your boots.
You should allow the laces to go outward rather than inward. Continue that way till you are almost done lacing to the top of the boots. Instead of crisscrossing, you can try other lacing up techniques to the top, but you leave the last set of eyelets at the top.
Step 2: Thread eyelets in loops
Instead of lacing through the last eyelet set and tying, you take the end of the lace and insert it inward without pulling it out fully. As a result, it forms a loop. Then, you do the same for the other end of the lace. You need these two loops to perfect the heel-lock technique.
Step 3: Cross and insert lace in the loops
After creating loops on both sides of the eyelets, you need to cross both ends of the laces to the other side to tie the laces. You take the left end and cross it to the right side and vice versa. Then, you insert the lace end through the loops on both sides.
Step 4: Pull the laces
After inserting the laces through the boot loops, pull the laces till they are tight. This will lock the heel in place so it doesn’t slide up and down in your boots.
Step 5: Tie the laces
Then, you need to tie the laces like you normally would using the granny knot or quick pull method, so the laces don’t loosen. However, take care not to over tighten the laces to the point of discomfort.
If your heel still slips in your hiking boots after this method, then the boots are extremely big for you, and you need to get the right ones. Nevertheless, remember to lose and retie your hiking boots’ laces at intervals on the trail to adjust to your feet.
Method 5: Two-zone lacing
You can also reduce pressure and friction in your hiking boots by tying your laces using the two-zone lacing. With this lacing technique, you create two zones on the hiking boots to reduce the pressure on the lower and upper parts.
It helps your feet ascend and descend on a hiking trail, especially when walking uphill or downhill. For example, you can tighten the lower zone when hiking uphill and do the same for the upper zone when you hike downhill.
This reduces the pressure and pain that you may feel in those spots when climbing up or down. In addition, they help prevent your feet from sliding forward or backward when climbing or returning uphill or downhill.
Step 1: Start lacing
Of course, before you start lacing your hiking boots, they will be loose at first. So, undo the lace, whether you are just setting out for your hike or you are already halfway there.
Then start by lacing your hiking boots using the crisscross method, starting from the first set of eyelets. Continue by lacing till you get to the deep draw hooks on your hiking boots.
This spot is where the hooks transition from the shaft to the instep to the shaft of the hiking boots. They are usually farther out on your hiking boots than the other eyelets.
Step 2: Thread the laces through the locking eyelets
The locking eyelets are the same as the deep-drawn hooks that most hiking boots have. So, when you get to that spot, thread the lace bottom-top through the locking eyelets.
Then, cross the laces to the other side above the instep and continue up to the shaft. This forms the first zone on the hiking boots. You can tighten that area when hiking uphill so you can secure your insteps.
Then, finish lacing your boots to the top. The other part at the top, after the locking eyelets, forms zone two, and you can tighten that area when hiking downhill. So, inter-change between tightening each zone accordingly when on the trail and reducing friction, blisters, or chafing
Conclusion
When on the trail, everyone can admit that reducing friction and, consequently, blisters as much as possible to enjoy your hike is needed. And you can reduce friction in different ways, and one of them is by tying your hiking boots appropriately.
Each tying technique has different areas they address, and you have to note which one you need before deciding on your pick. For example, the heel-lock technique helps to lock your heel in place, while the window lacing helps to reduce pressure around hotspots in your hiking boots.
So, first you need to identify what you need. Also, you must retie your laces at intervals when on the trail. This helps you adjust the laces according to your needs and relieves your feet of pain.
You need this, especially if you will be on the trail for an extended period of time. Lace tying is one skill you will need on the trail, and since you now have the techniques, you can try to prevent blisters.
There are several other tying methods for hiking boots, but the ones we discussed in this article are specifically for preventing blisters. Ensure you note all these methods so you can put them to good use when hiking.
Have fun on the trail!